PCC1 I'm almost done with PCC1. I modeled, textured and rigged this character based on an amazing concept by talented artist, Mohammad Kheirandish. Elefun was so fun and I'm happy with the way he came out. I can't wait to animate him.
Wednesday, October 22, 2014
Animation Production
This class was the last animation class. During this month we supposed to work on a group project. The project was a short animation which has two characters. The story is about Mr. Bugzy rescues Miss Bugzy who tied up in a room. Each member of the group was responsible for two shot which was chosen by the teacher. We needed to draw storyboard and record ourself acting out the specific scenes that we were working on as references. I worked on Shot #8 ( Miss Bugzy is sitting on a chair ties up. she is sad but she gets happy when she sees Mr. Bugzy outside the window.), and shot #12, which is the final shot( Mr Bugzy already untied Miss Bugzy. He start running after her). This class was a great opportunity to work with other people and achieve our goals. In every lecture we got critiques from course director and other student and we needed to apply those critiques on our animation. We practiced communicating and problem solving.
Wednesday, September 24, 2014
Visual Effects 2
During this month we worked on Maya, Houdini and we did lots of research and trouble shooting on the projects. They gave us the chance to experience the real world situation which is just researching and figure it out how to go around a problem. The first project was working with Maya Fluid.I import the bonfire in Maya. I needed at least two containers
to create the fire in the reference video.
I used object emitter from different of wood geometries that I made
randomness. I adjusted Buoyancy and Dissipation to get the speed of burning and
the size of the fire that I want. I changed the Swirl to avoid the fire just
going directly upwards, I added a little turbulence to the fluid container as
well to get more random movements. If I needed more random movement I also can
add a turbulence field to the all the containers so it will effect all at the
same time. Changing the temperature and
Fuel section gave me the chance to make temperature more turbulent and more
buoyant, because the hot air is rising quicker. For the color of the fire, I
set the color in shading tab and put the input as density. For transparency I tweaked the opacity section
which has a density input. For render I chose mental ray I used point lights
around the fire with an expression on intensity to get that random light
changing in the scene.
For the second project, we supposed to create a fire in Houdini.I imported my house in Houdini with a geometry node. I imported
the material in Material Palette tab. I assigned Mantra surface material
because in Houdini we needed to render in Mantra instead of mental ray. I useed
Targa as a format for diffuse map. I made 4 cubes geometry as the emitter,
which cover the window from outside that creates the illusion of fire coming
out from inside the house. I used Pyro FX- Explosion to start. For the fire to collide
with the house I turn the house to be static object. I added another smokeless fire to the emitter
to create randomness for the fire size. I spent most of my time in pyrosolver adjusting
the size, shape, speed, and etc. In shape tab I adjust the shredding. In
simulation the timescale and buoyancy lift, I tweaked around to find the right
speed. In addition, I change the direction of the smoke and fire with buoyancy
Dir. I had a problem with smoke, which caused the smoke to grow in –Y so put
the gravity node after pyrosolver node and I set the force to 20 positive Y.
Getting a nice render was the hardest part that gave me a hard time. In shop tab, I apply fireball material shader
to the explosion; in smoke density I adjusted the field shape. And for the color I used float. In fire tab I
adjusted the float in density, which was kinda similar to opacity ramp in Maya.
And I changed the color by the ramp in color tab under fire. In shading I
changed the brightness Model to Match Mantra because I used Mantra as the
render engine. I adjusted the similar setting for the other fire shader. For
render, I had a hard time to get a nice image without noise. I found a Noise
level under sample tab in render node which decreasing that helps a lot. I
changed my pixel sample and tile size to get a better quality. For the lighting
I used the default skylight. I just adjust the intensity and the color.
For the third project, we supposed to choose an effect that we have never done that. We had to do so many research and trouble shoot the issues that we get in to while learning and finishing the project. I used DMM plugin, which comes with Maya2012 for creating the glass
shattering. I created two spheres on top of each other. I made one of them
bigger than the other. The inversed the normal on the inside sphere which collides
with smoke from inside. Then I combined these two together and turned them to
DMM object. I created another small sphere and made that to passive DMM object.
And I animated in a way so it pass through the other sphere and as far as it’s
colliding it makes the sphere to break apart. I choose DMM material for the
combined spheres as weak-crystal. I created a region passive for the active DMM
which cause to save some parts of the globe to not gets broken that much and
not gets shoot outside. I adjust the density of the active DMM in order to stop
it from breaking before colliding with passive DMM. For the direction of the
shard of glass I gave it zero gravity so it causes them to spread in all the
directions. After I got the result that I liked, I cache the geometry in
animation tab and I deleted all the other shape nodes from DMM objects so I had
my geometry pieces ready for the second part, which was smoke fluid. I have two
containers in my scene. The first one is for inside smoke and the second is for
smoke which emitting from shard of glass. I created an emitter inside the
center of globe, which collides with inside inversed sphere that I already had
in my scene. I adjust buoyancy, opacity, velocity, swirl, turbulence and etc.
to get the shape and speed that I wanted. The reference smoke is white but I
wanted to give it more color so in shading tab I made a smoke red. For
rendering I created two spotlights, and IBL. The Globe texture is glass. When I
render my scene I realized that I cant see the smoke inside the glass. I adjust
my ray tracing but I couldn’t get the result. I tried to put an object inside
the glass to see if it just doesn’t show the fluid, and it was true. I could
see the geometry inside the glass but fluid. I even tried a plane in front of
the fluid and I gave it glass material and I gave it enough ray tracing to show
the fluid behind it but I couldn’t get it. I changed the ray tracing in
different area such as glass material advance refraction, reflection, render
quality, final gathering ray tracing, and in the lights ray-tracing tab. I
research a little bit but I couldn’t find anything about this issue. So in my
render my the sphere that breaks the globe is showing inside the glass but the
smoke doesn’t show inside it while its emitting from inside. However, you can
see the smoke in the playblast.
Thursday, June 26, 2014
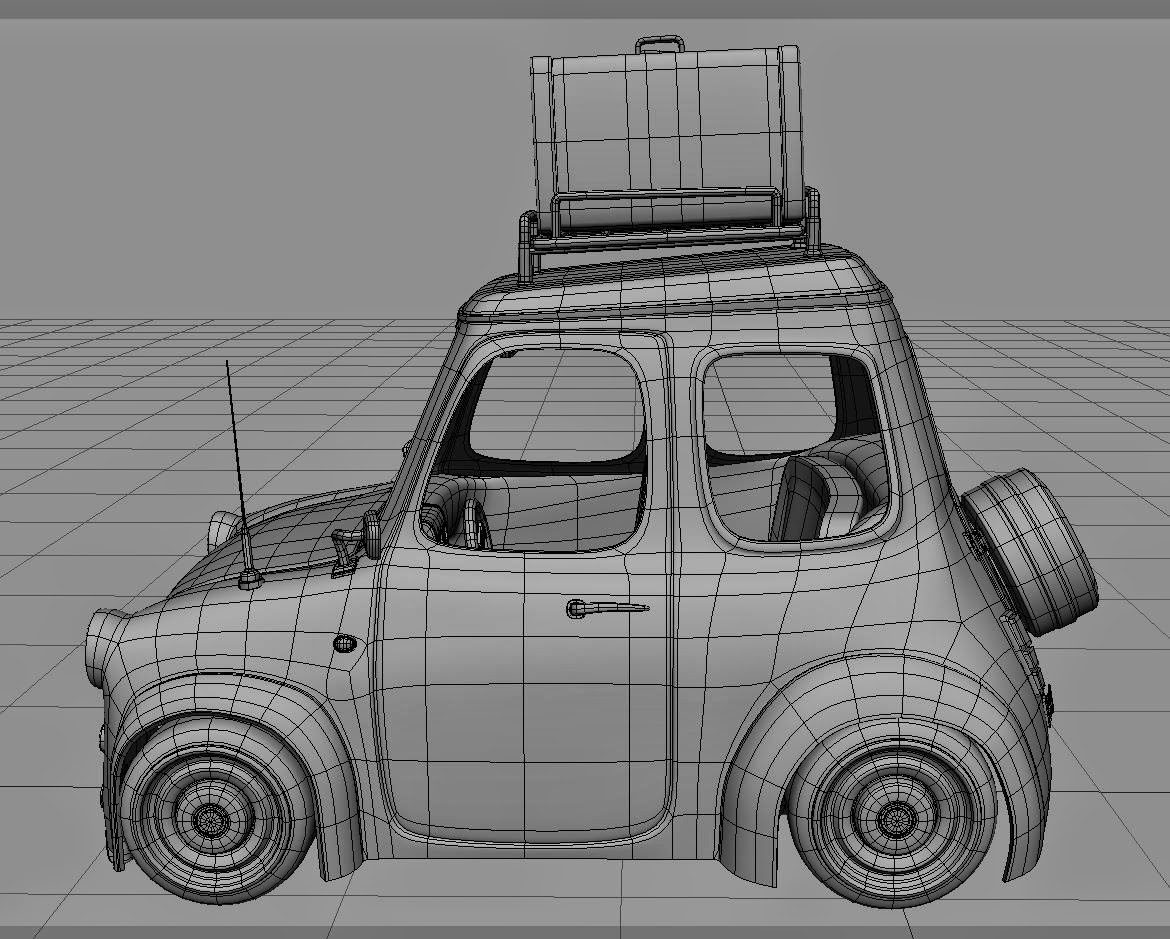
Software Technology During this month we had a chance to work with different somewhere that I've never worked with them before; Softimage, and Houdini. We started in Softimage by modeling a fence, and then we modeled a vehicle. I chose a stylized car.
In Houdini we learned how the node system works. It was an unique experience. We supposed to do a research project to create a simple marble machine in Houdini. I modeled the marble in Maya and I used Terrain and RBD object to create the simulation of the ball in Houdini.
Character Animation 2
This class levels up our knowledge after Character Animation1. For the first project called Pantomime, which we planned on a story using the given character to have an emotional change. we did some pre-production, such as characterization, exploratory, storyboard, and breakdowns. Then we recorded ourselves as a reference.
The second project called Sound Clip. In this project we had to plan and animate the character based on a given sound clip. We did the pre production the same way that we did for the first project and then we recorded ourselves as a reference video.
Visual Development In another world this class was Shading and Lighting2. We took our knowledge to the next level. We learned what is the proper way to create UV and texture, different lights, glass material, layering in Maya, and etc. Final Project(Compositing): In this project, we render the same scene as previous project in different Render Layers with different passes; Key_light, Warm_light, Cool_light, IBL_layer, and Camera Depth. And we composite them in Nuke.
This image shows the render before editing in Nuke.
This image shows the combined render layers after editing in Nuke.
Shading Project : I created the material for the glass bottle, plus label, dirt and bevel text. And in the second part I created a material for the liquid inside the bottle. I used Mental ray, mia_material_x_passes. I used layers to apply label and dirt to the material.
Diffuse Project : In this project, I created the UV for Gear and scraper, then I made the texture in photoshop. For the box I created dirt, and sticker using layers in Maya.
Visual Effects 1 This was the first class of VFX and it was awesome. we worked on so many different things such as simulating Rigid Body, Particles and Soft Body.
Character Animation I During this month we started working on the next level of the animation. we animated the full character for the final.
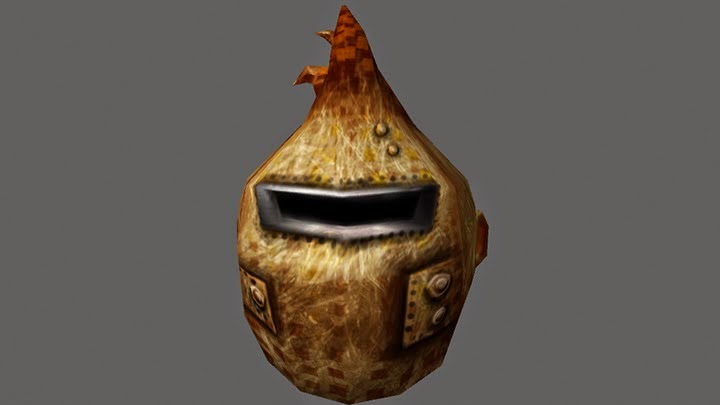
Production Modeling We did so many speed sculpting in Zbrush based on the given concepts. And for the final we modeled a high detail character and we tried to make it as close as to the original concept.
Final project
30 min speed sculpt in Zbrsuh
30 min speed sculpt in Zbrsuh
Character Rigging 2 During this month we took our knowledge about rigging to another level. We learned skin binding, paint weight, hair and fur, jiggle and etc.
Character Rigging 1 In this class we learned the basic of rigging and scripting Phyton/Mel. Plus we created a proxy rig for a character with ik/fk system.
Fundamentals of Animation During this month we took the knowledge that we got from 2D animation and converted it to 3D animation in Maya. Once again it was an honor to get another Course Director Award for this course.
Compositing Fundamentals
During this month we got to work on compositing for the first time. It was a really fun class.
2D Animation This class was awesome. We had a chance creating 2D animation based on the 12 principles.
Character Design and Creation We started to take our modeling skill to another level. During this month, we learned edge flow in a character and we started messing around with Zbrush and experimenting the different pipelines.
Methods of Design Once again It was a honor that my piece of art chosen to be featured on the wall of art building. I got awarded Course Director Award.
"The Goose Girl" Character: Falada Theme: Science Fiction/ Fantasy
"The Goose Girl" Character: Princess Theme: Science Fiction/ Fantasy
Lighting and Shading During this month we worked with the basic Maya Mental ray and mia_material_x. We learned the fundamental of lighting a 3D scene. I got awarded Course Director Award.
Model Creation
This class was focusing on basic 3D modeling in Maya. The final project was recreating the given picture in 3D. I got awarded Course Director Award which was a huge honor for me.
Fundamentals of Art 2
I had the chance again that all my pieces of art chosen to be featured on the wall of the art building.I got awarded Course Director Award.
Fundamentals of Art 1
In Art1, I had almost all my pieces of art chosen to be featured on the wall of the art building. It was a huge honor for me.
Character Design
Character & story Technique: Collage
Still life drawing Charcoal and pencil 24"×18"
Regular girl and guy turn to the super thug! Colored pencil 24"×18"
Environment Design
Software used: Photoshop
3D Foundations
During this month I had a chance to create my first short animation from sketch to compositing. As the title of the class shows, we learned the foundation and basic of 3D animation. I started with the story board, modeling, rigging, UV and texturing. Then I learned the basic principles of animation and a little bit rendering.